MLC LLM: A Deployment Engine for ML Compilation
What is MLC LLM?
MLC LLM (Machine Learning Compilation for Large Language Models) is an approach used to run and optimize large language models (LLMs) more efficiently. MLC uses compilation techniques and optimization methods to make language models faster and more cost-effective. MLC is specifically built on top of Apache TVM (Tensor Virtual Machine) and optimizes LLMs to run on various platforms such as browsers, mobile devices (Android and iOS), CPUs, and GPUs.
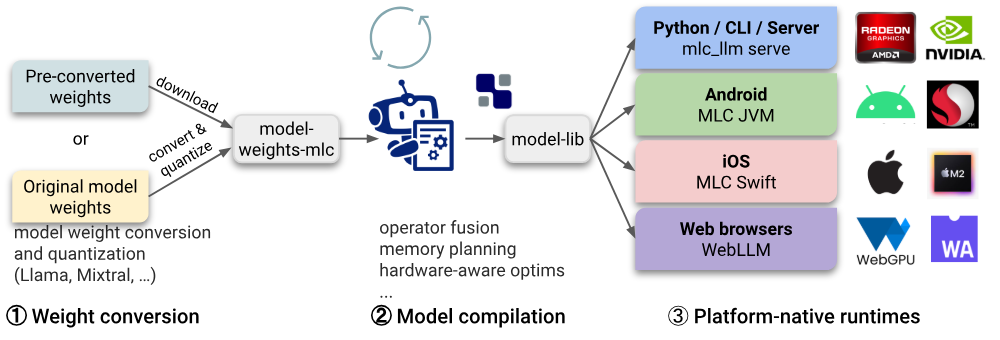
Figure: Workflow in MLC LLM
Apache TVM
To compile MLC LLM, the latest development of TVM Unity, also known as Apache TVM, is required. TVM Unity is a compiler developed to make large language models (LLM) faster and more efficient. This compiler enhances speed and efficiency by performing hardware-specific graph and memory optimizations. Additionally, it maximizes performance using kernel fusion techniques.
Key features of TVM Unity include:
High-Performance CPU/GPU Code Generation: Provides instant high-performance code generation without the need for additional tuning or adjustments.
Support for Both Inference and Training: Supports both inference and training phases of the model.
Efficient Python-First Compiler Implementation: The compilation process can be entirely done in Python, offering a user-friendly API.
For example, let’s consider a simple CNN model. Let’s choose Pytorch FX as the frontend. Pytorch FX allows us to trace the execution graph of Pytorch-based models.
class MLPModel(nn.Module):
def__init__(self):
super(MLPModel, self).__init__()
self.fc1 = nn.Linear(784, 256)
self.relu1 = nn.ReLU()
self.fc2 = nn.Linear(256, 10)
defforward(self, x):
x = self.fc1(x)
x = self.relu1(x)
x = self.fc2(x)
return x
Unlike ONNX models, PyTorch models do not contain information about the shape and data type of the input data. Therefore, when providing the model to the compiler or converter, we need to manually define this information.
The input structure is defined as follows:
input_info = [((1, 784), “float32”)]
Then, using the TVM Unity API, the PyTorch FX model is converted to a Relax model.Up to this point, we have successfully converted the PyTorch FX model to a TVM IRModule. This module is used for subsequent transformation and optimization processes.
Some optimization processes are as follows:
LegalizeOps: Converts mathematical operations or computations in the model to be executable on hardware. These are converted to TensorIR functions.
AnnotateTIROpPattern: Adds Pattern Tags to TensorIR Functions. Operations are grouped together, thus increasing efficiency and speed.
FoldConstant: Pre-solves Operations with Constant Values. If there are operations with constant values in the model, it calculates them before running the model and saves the result.
FuseOps and FuseTIR: Some sequential operations in a model are combined to be executed at once.
After the optimization, we can compile the model into a TVM runtime module. Apache TVM Unity use Relax Virtual Machine to run the model.
exec = relax.build(mod, target=target)
dev = tvm.device(str(target.kind), 0)
vm = relax.VirtualMachine(exec, dev)
Now we can run the model on the TVM runtime module. This way, the model will be compiled. You can compile any Hugging Face model to run on your hardware. For more information, visit the MLC LLM site.
How to run LLM model with MLC?
To run the model with MLC LLM, you need to follow three steps: convert weights, generate `mlc-chat-config.json`, and compile the model.
Firstly, you need to download the quantized model or use the `gen_config` function of the MLC LLM Python package to create the `mlc-chat-config.json` file, process tokens, and quantize the models. The, download the TVM Unity Compiler to compile the model. To specify the desired hardware, use the `–device` parameter with one of the following options:
- Cuda
- Metal
- Vulkan
- Iphone
- Android
- Webgpu
This way, LLM models can be run on different hardware platforms.
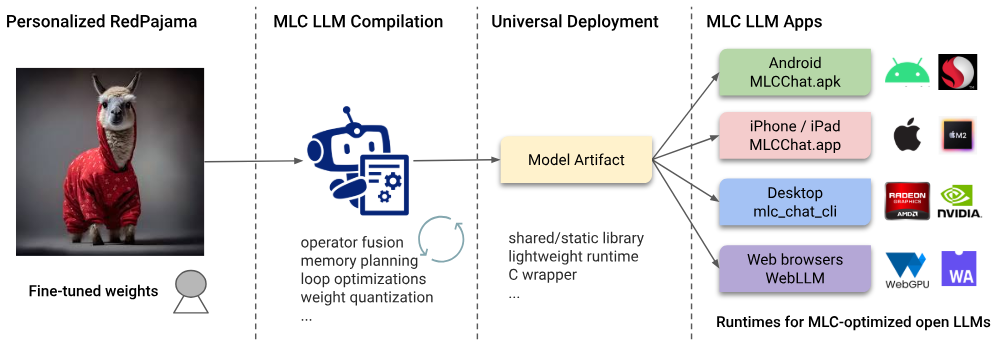
Figure: Workflow in MLC LLM
MLC LLM is also integrated with an interface called WebLLM . WebLLM is a modern and user-friendly platform developed to enable users to leverage the capabilities of MLC LLM more efficiently and effectively. This interface aims to maximize the potential of the model by offering a wide range of use cases for both developers and end users. The main features of WebLLM are:
In-Browser Inference: High-performance language model operations are performed directly in the browser with WebGPU support, eliminating the need for a server.
OpenAI API Compatibility: Provides full compatibility with JSON mode, function calling, and streaming support.
Wide Model Support: Supports models such as Llama, Phi, Gemma, RedPajama, Mistral, Qwen, and more.
Custom Model Integration: Easily integrate custom models in MLC format.
Easy Integration: Quick setup with NPM, Yarn, or CDN and easy connection with UI components.
Real-Time Output: Provides instant output for interactive applications with streaming chat completion.
Web Worker and Service Worker Support: Optimizes interface performance by performing computations in the background.
Conclusion
MLC LLM is a powerful tool for running large language models more efficiently and optimally. By integrating with Apache TVM Unity, it offers high-performance model compilation and execution on various hardware. The optimization techniques and broad hardware support provided by MLC LLM enable language models to be used faster and more cost-effectively. Additionally, with WebLLM integration, it offers high-performance inference within the browser. For more information and detailed guidance, visit the official documentation of MLC LLM.
Running MLC in Cordatus
Leveraging local Large Language Models (LLMs) unlocks powerful AI capabilities directly on your device, ensuring data privacy and enabling robust edge AI applications without cloud dependency. However, efficiently setting up and running these models, especially on embedded platforms like NVIDIA Jetson, can be daunting. Cordatus, combined with the MLC engine, streamlines this entire process, allowing you to deploy and serve LLMs locally with remarkable ease.
This guide walks you through using Cordatus to run LLMs powered by MLC (Machine Learning Compilation).
Why Use MLC within Cordatus?
Optimized Edge Performance : MLC is tuned for various hardware, including NVIDIA GPUs found in Jetson devices, leveraging specific acceleration features for maximum throughput.
Efficient Resource Usage: Its optimized design minimizes CPU and memory overhead, making it highly suitable for resource-constrained edge devices.
Fast Inference: Pre-compiling models for target hardware ensures low-latency responses during execution.
Seamless Integration: Cordatus handles the complexities. No manual MLC setup or dependency management is needed; Cordatus configures and deploys MLC automatically with your chosen model.
Running Popular LLMs (DeepSeek, LLaMA, Qwen) with MLC on Jetson via Cordatus
You can launch an MLC-powered LLM in Cordatus using two primary methods. Follow the steps below:
Method 1: Model Selection Menu
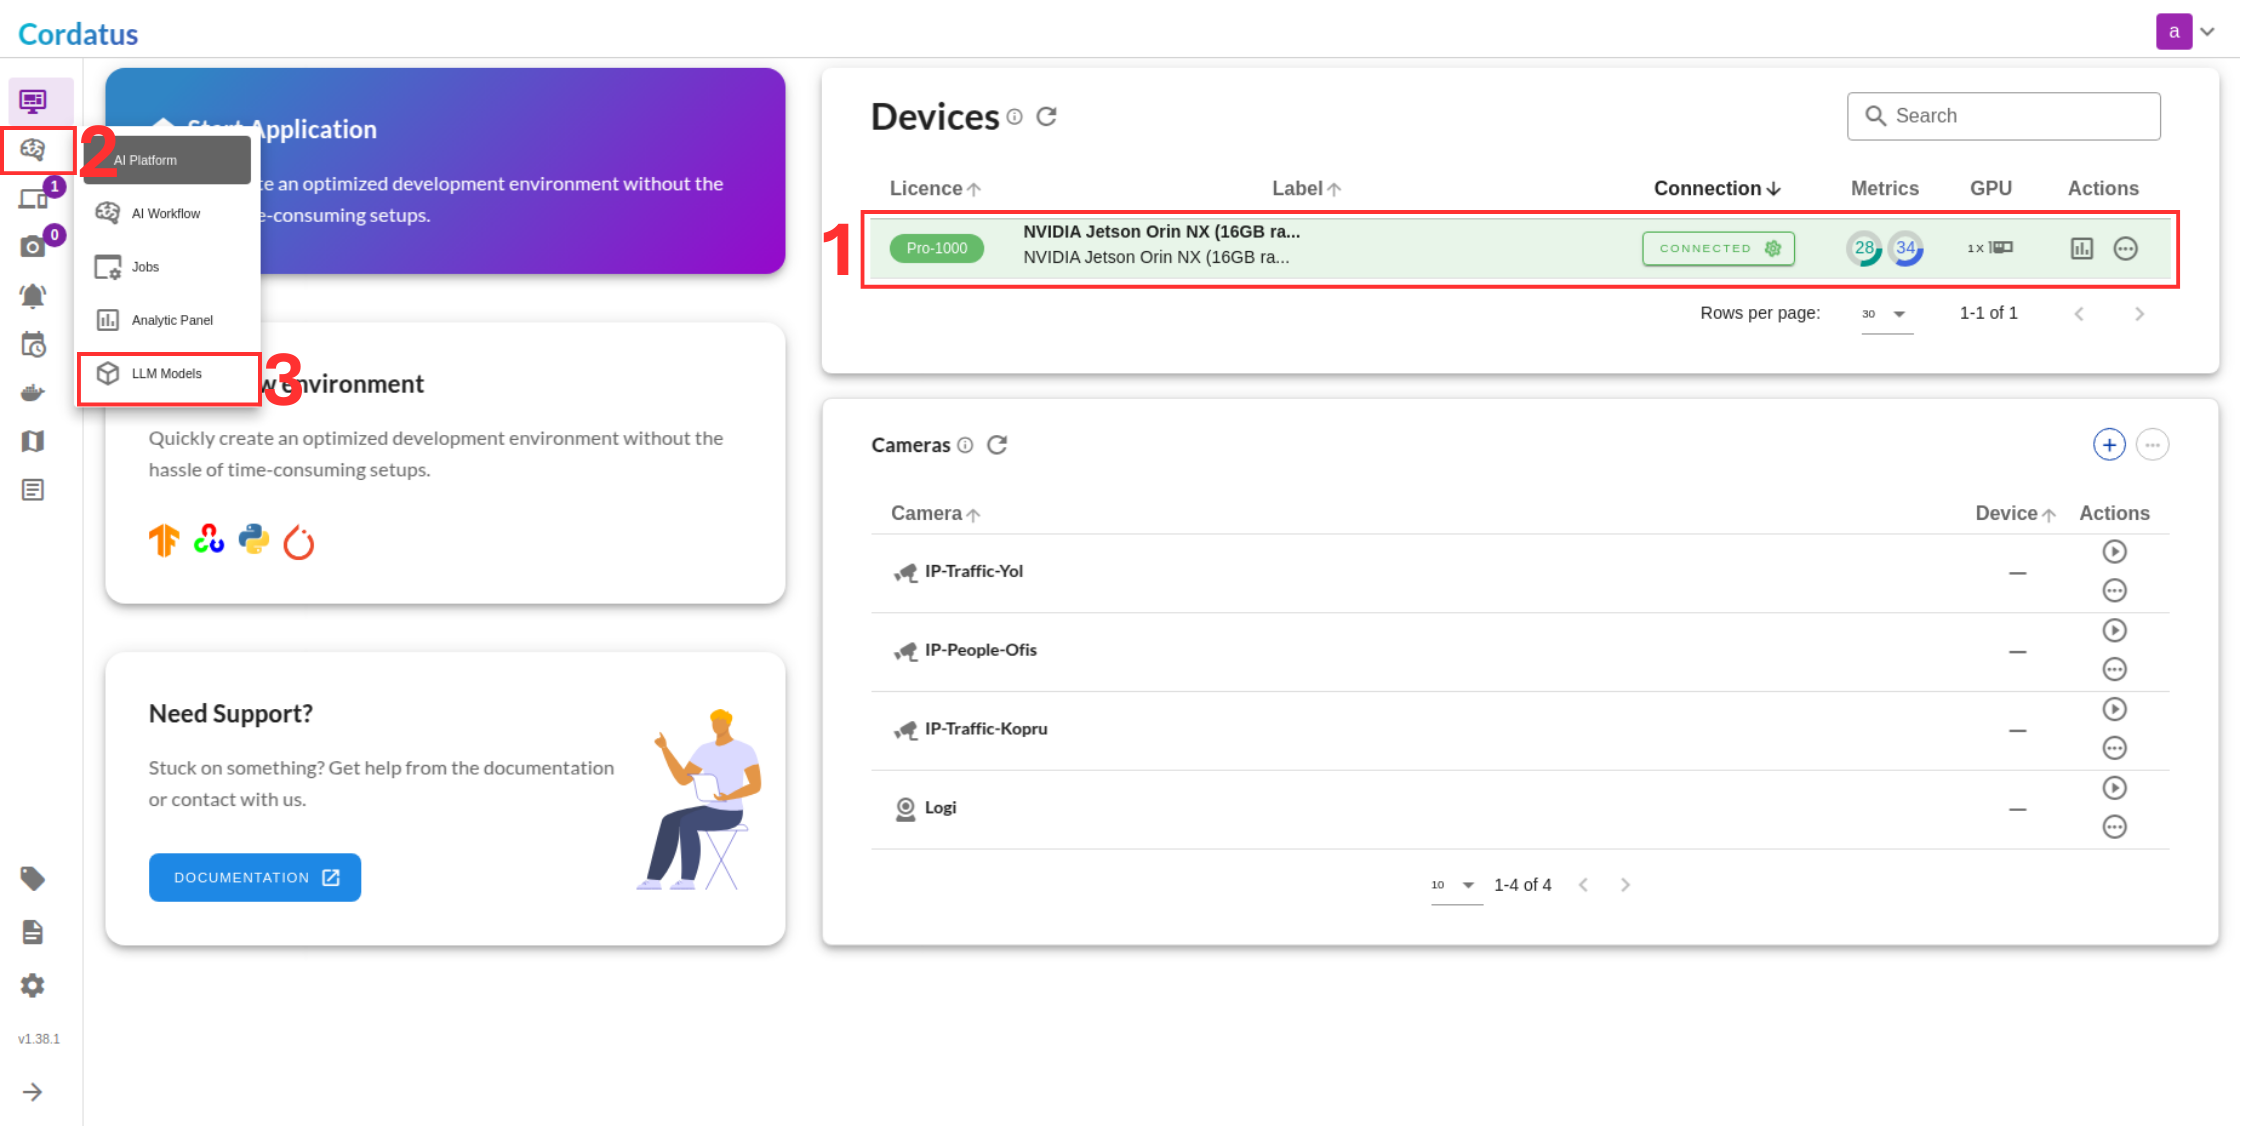
1. Connect to your device and select LLM Models from the sidebar.
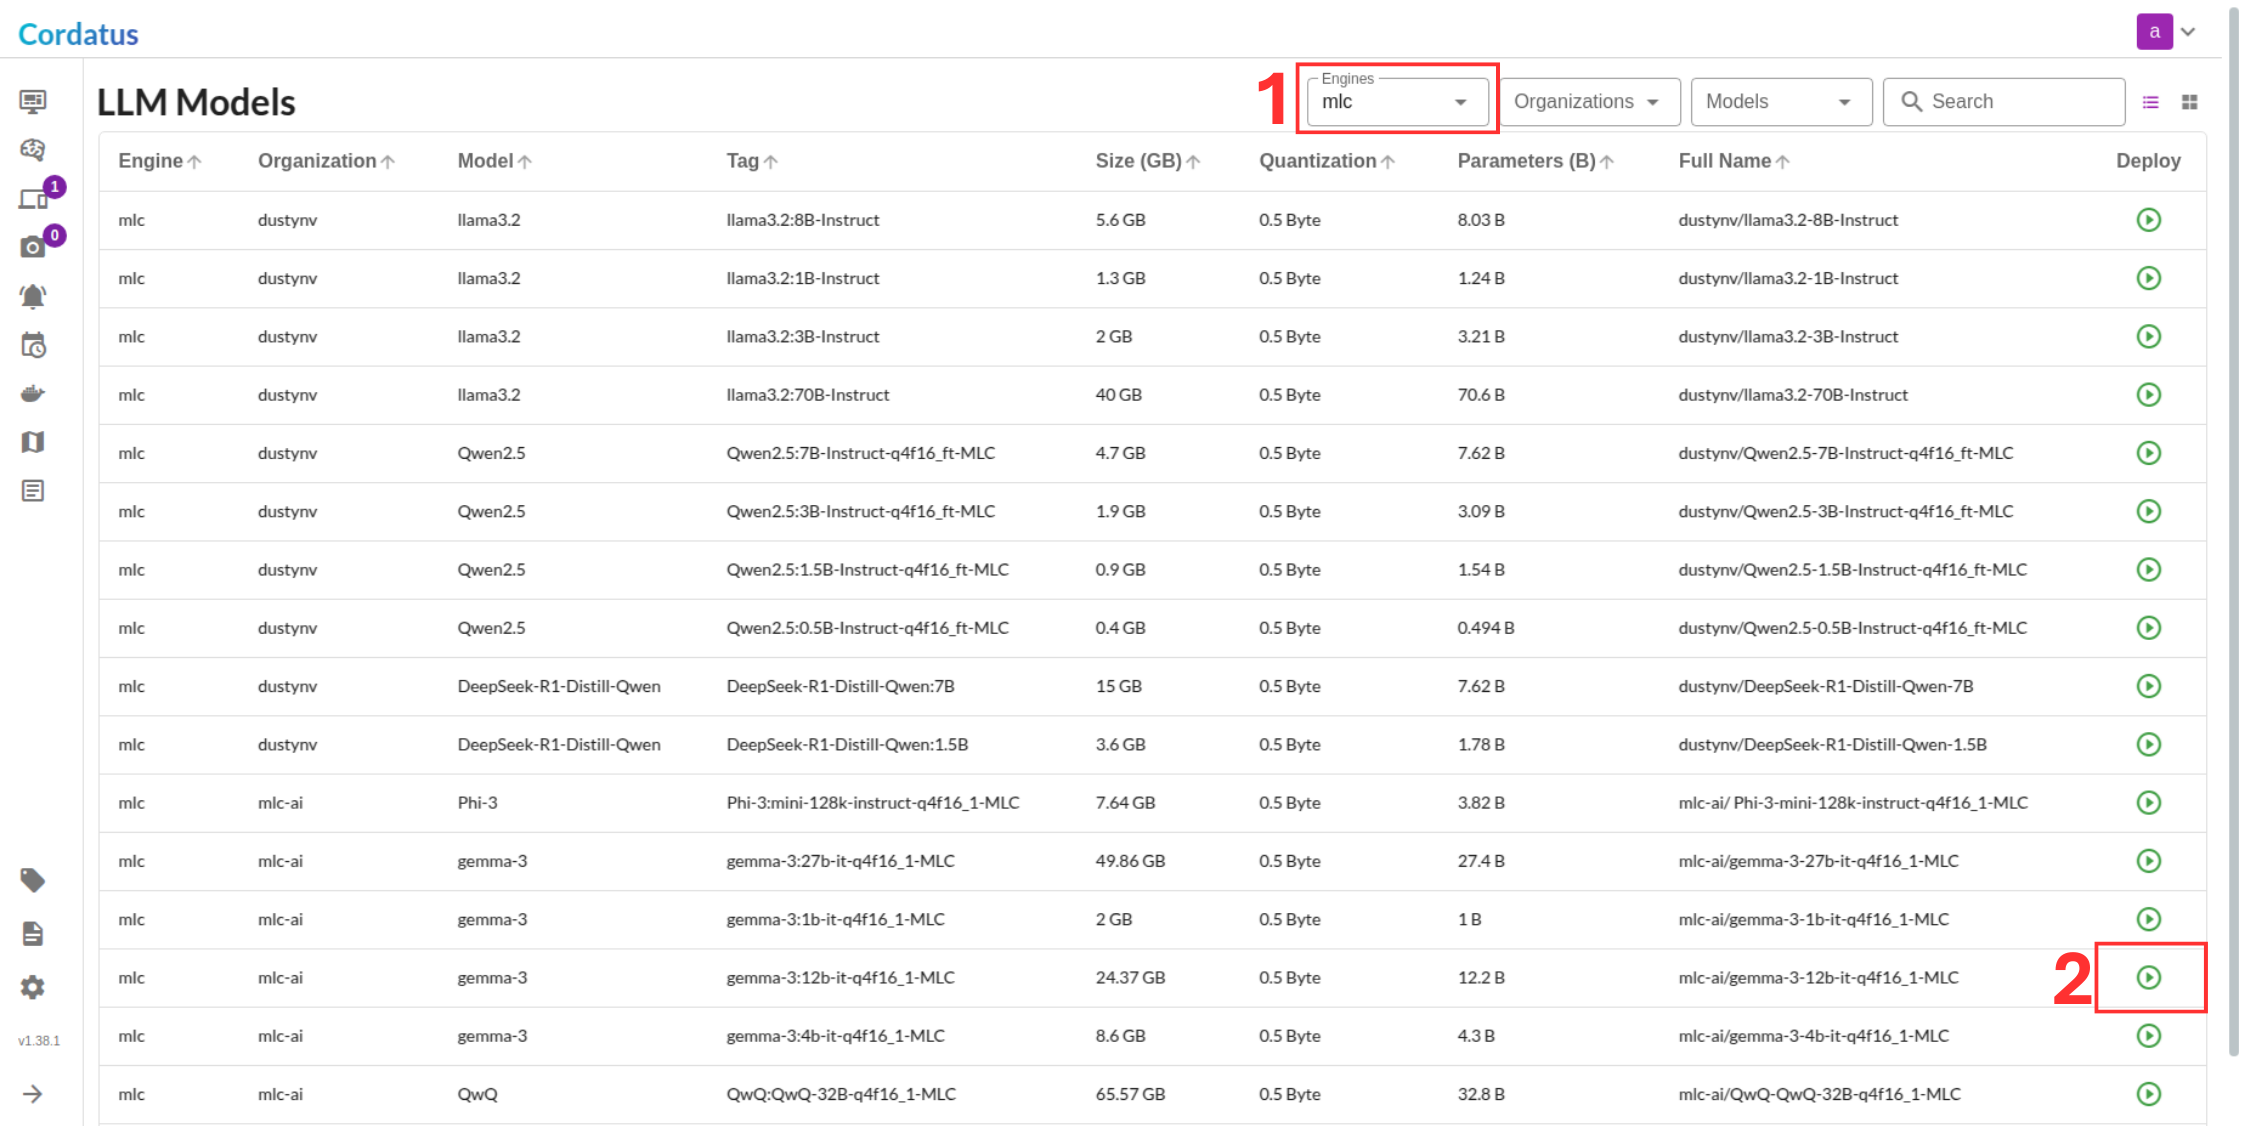
2. Select MLC from the model selector menu (Box 1), choose your desired model, and click the Run symbol (Box 2).
Method 2: Containers-Applications Menu
1. Connect to your device and select Containers-Applications from the side bar.
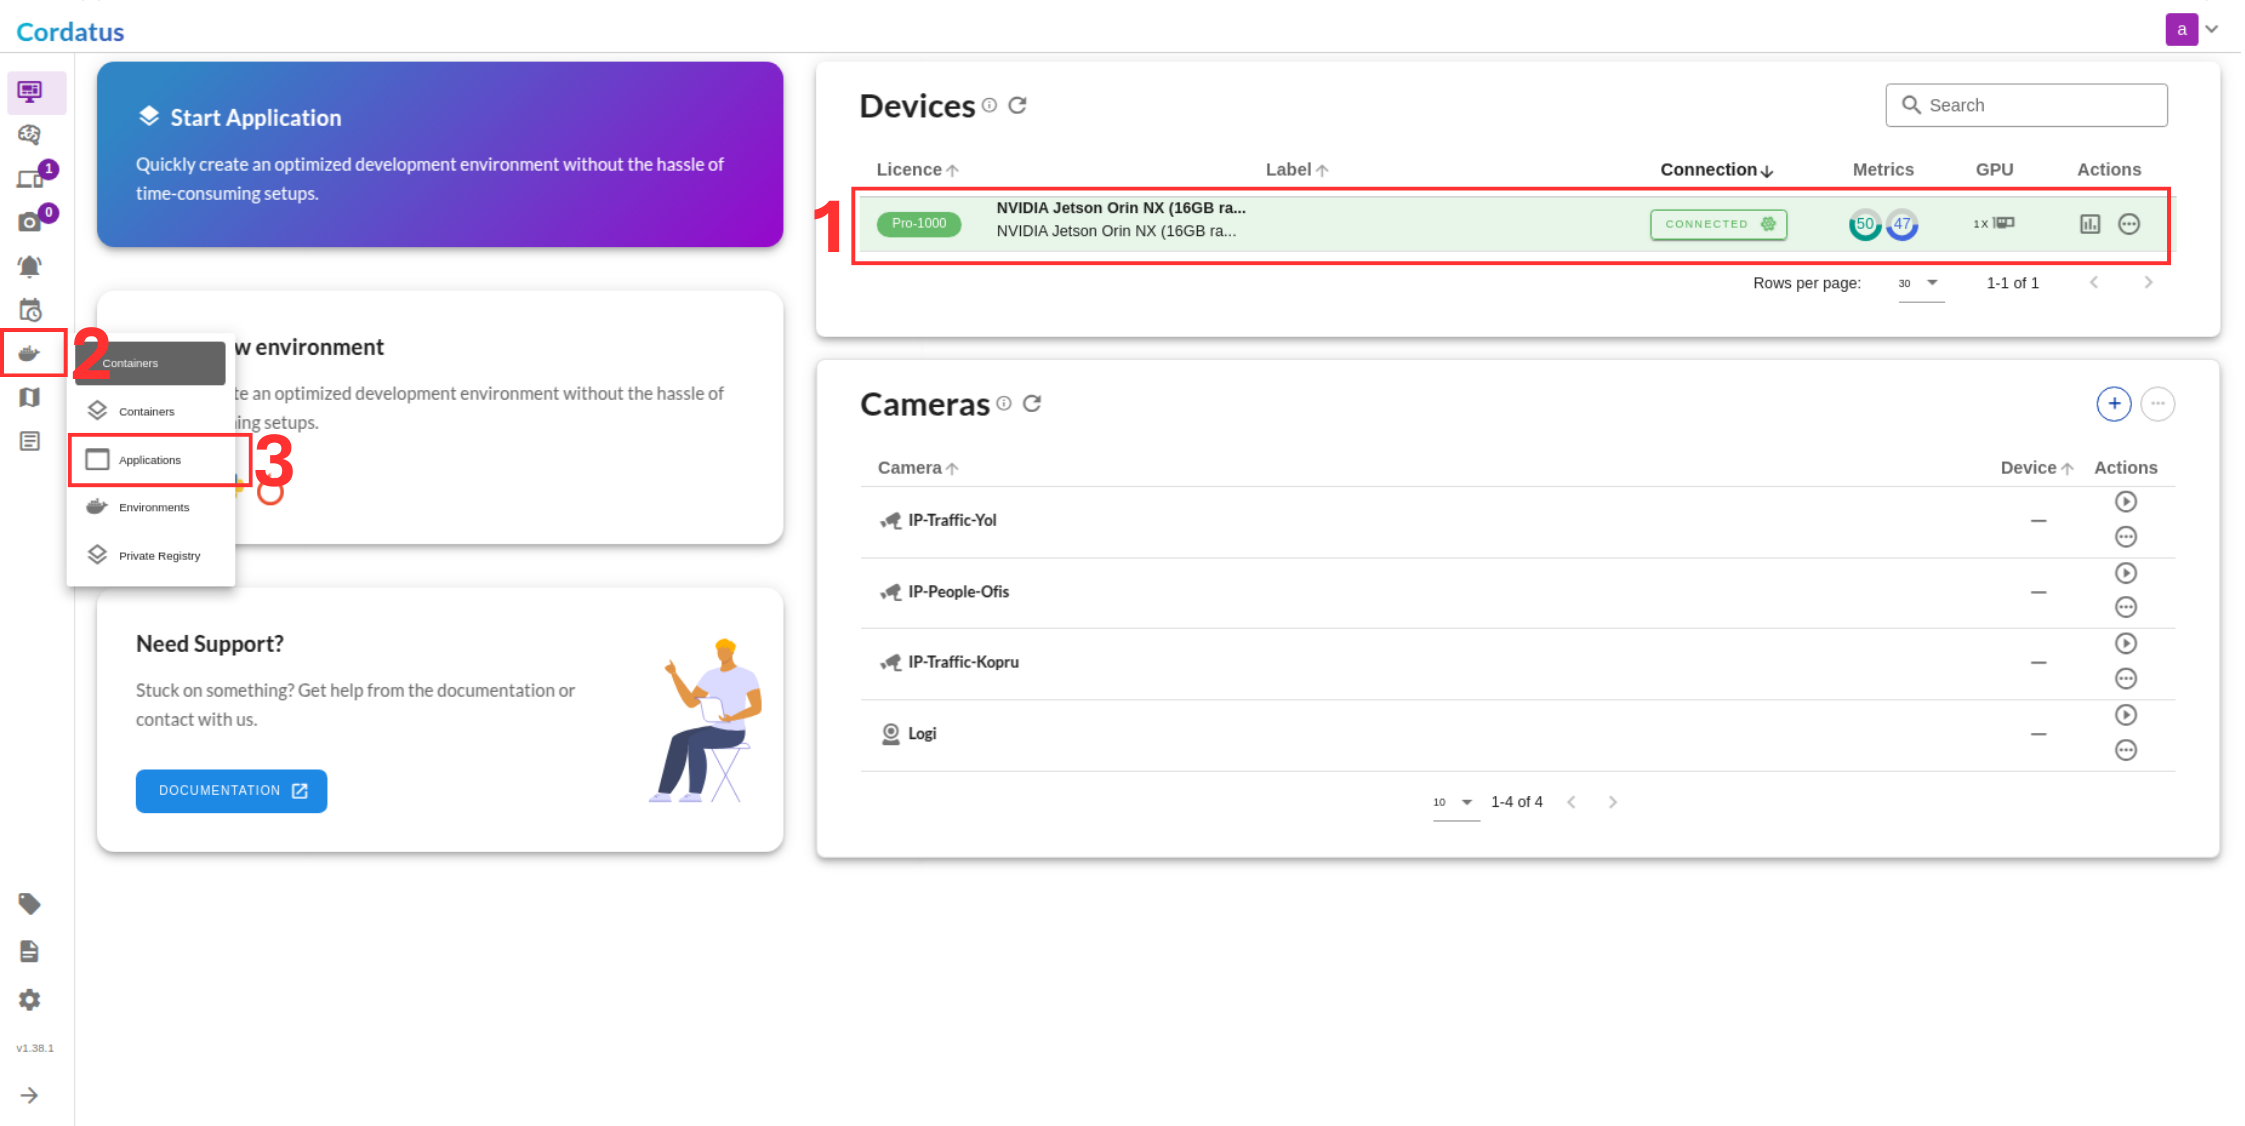
2. Select MLC from the applications menu.
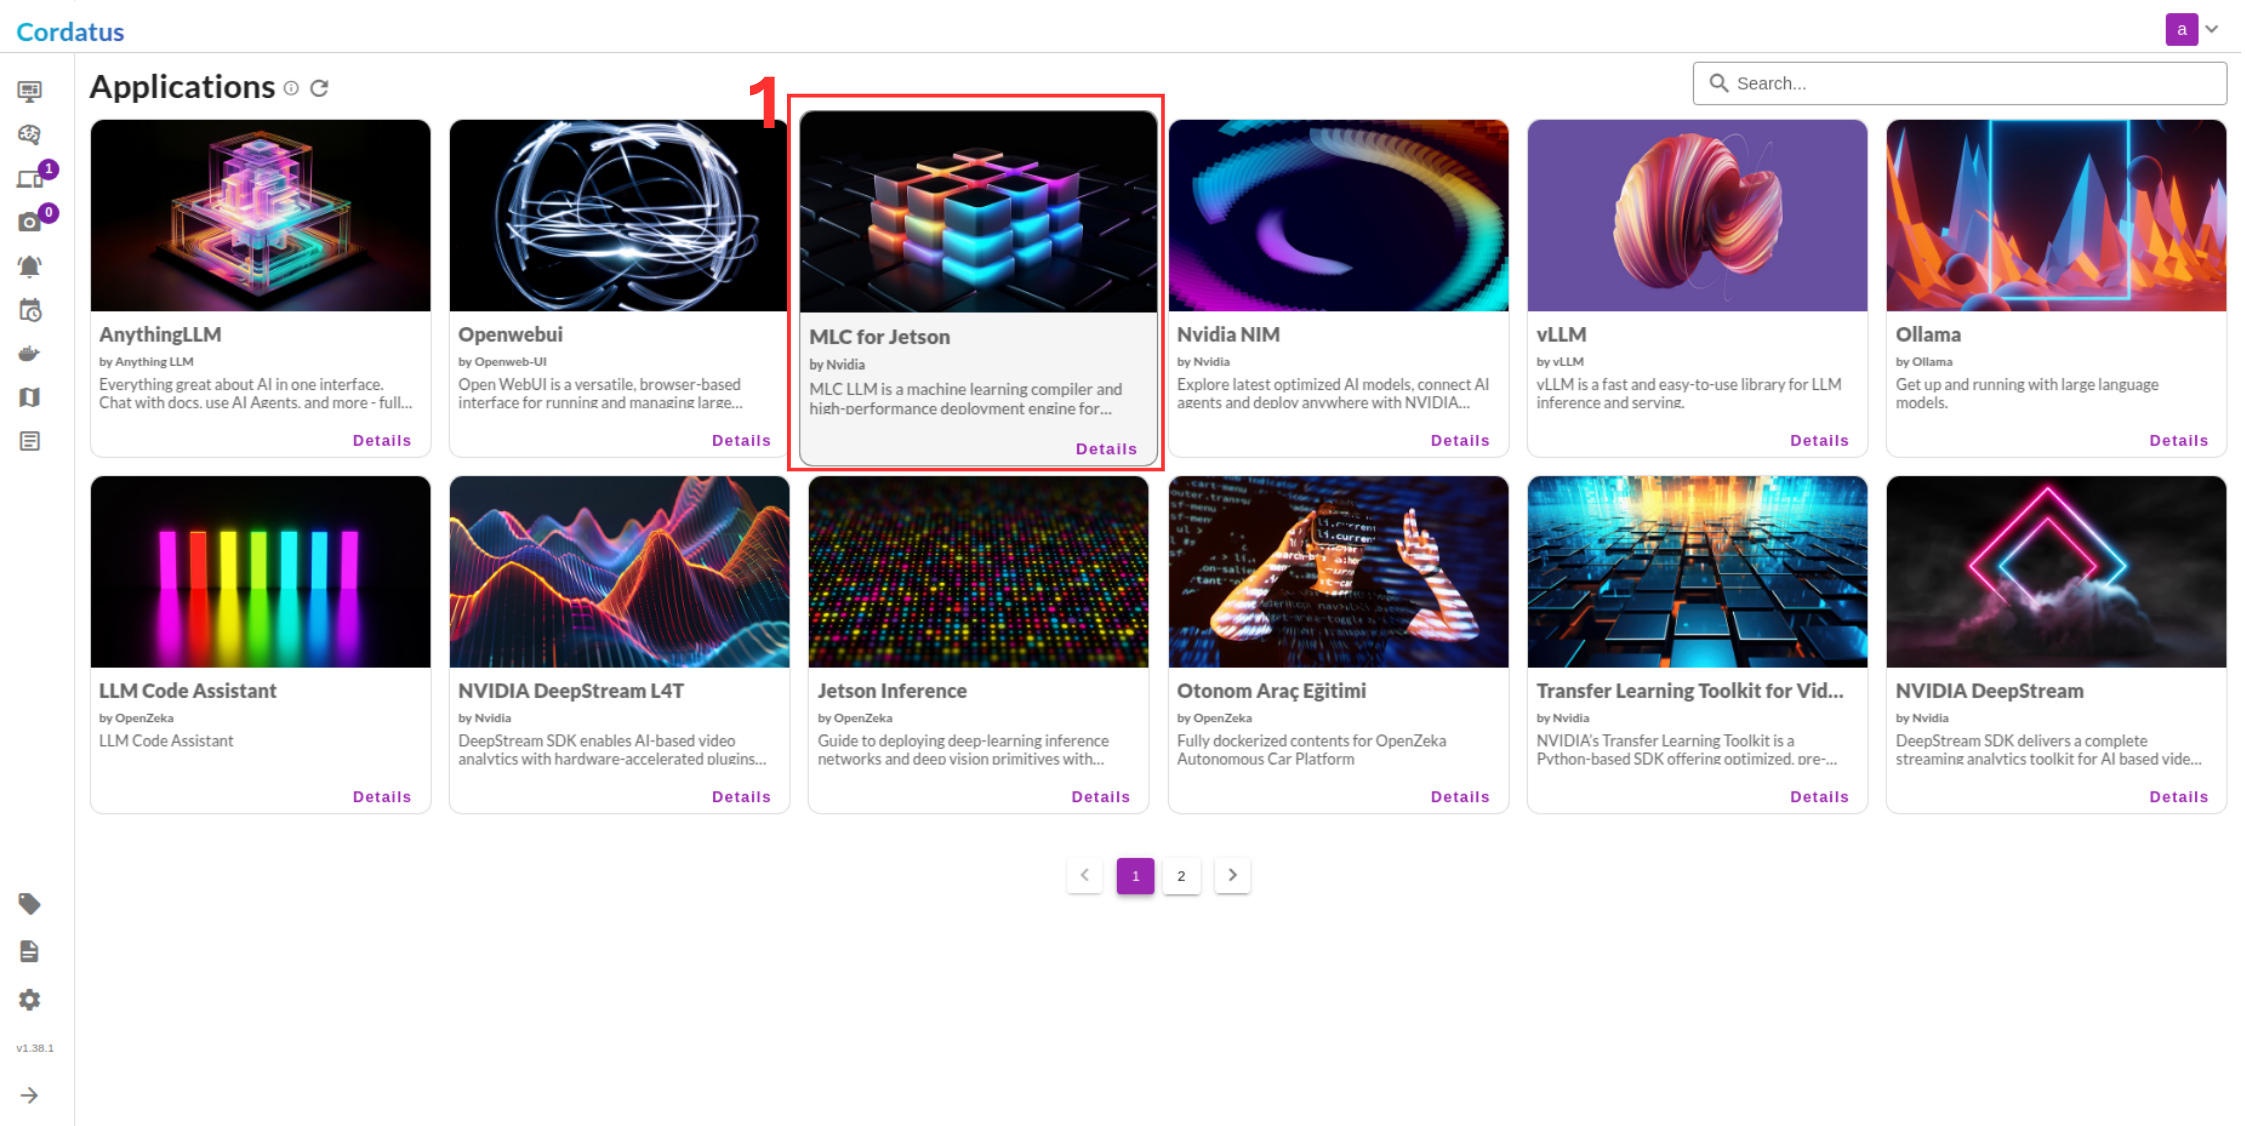
Note: You can run any application that you see here on thi menu. It is dynamically created by cordatus based on your device info
3. Click Run (Box 1).
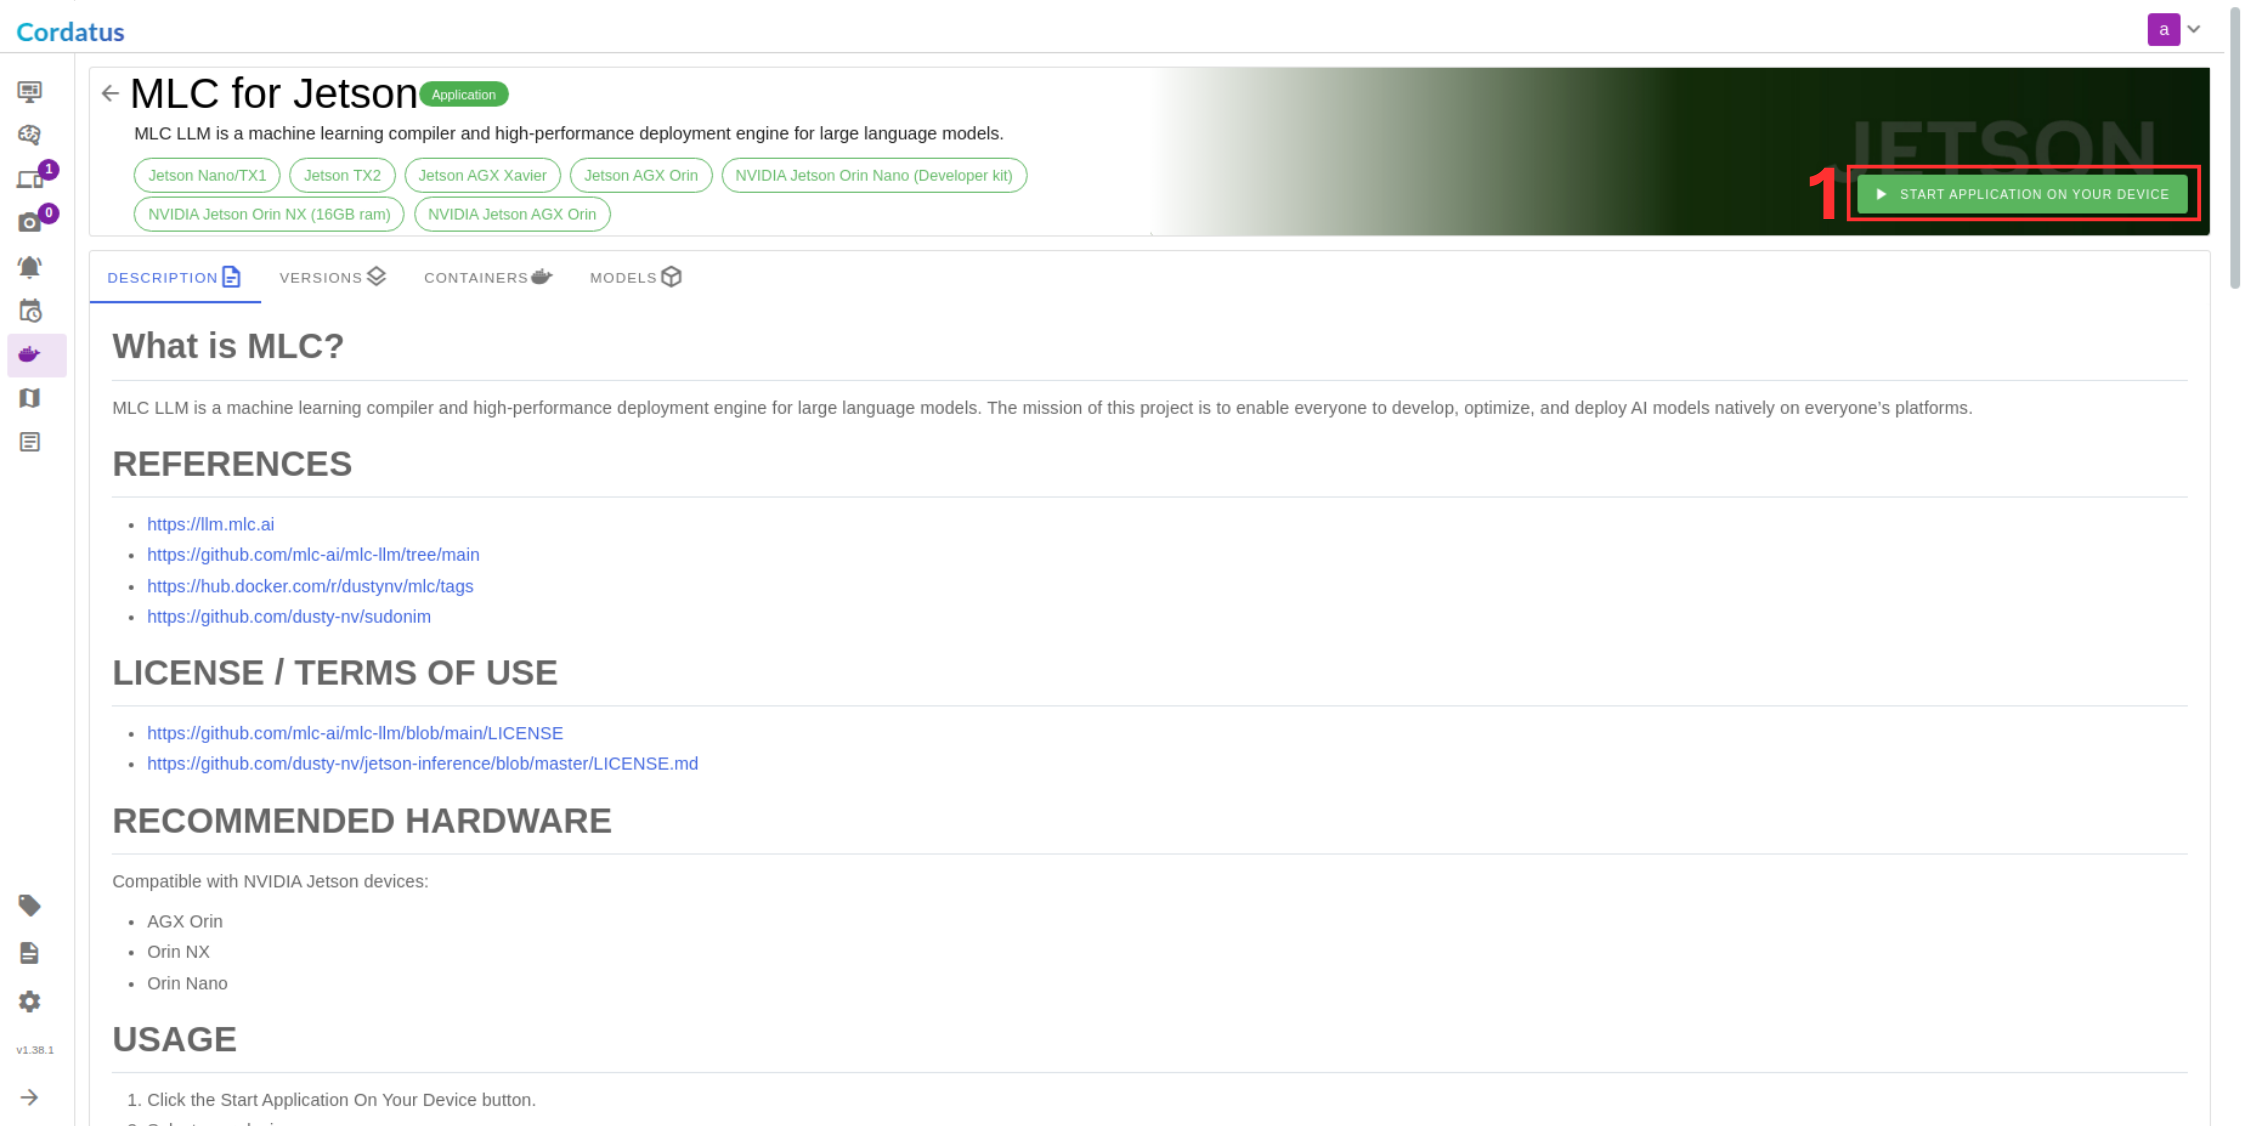
Configuring and Running the Model
After selecting the model, the following steps apply to both methods:
4. Select the device where the LLM will run.
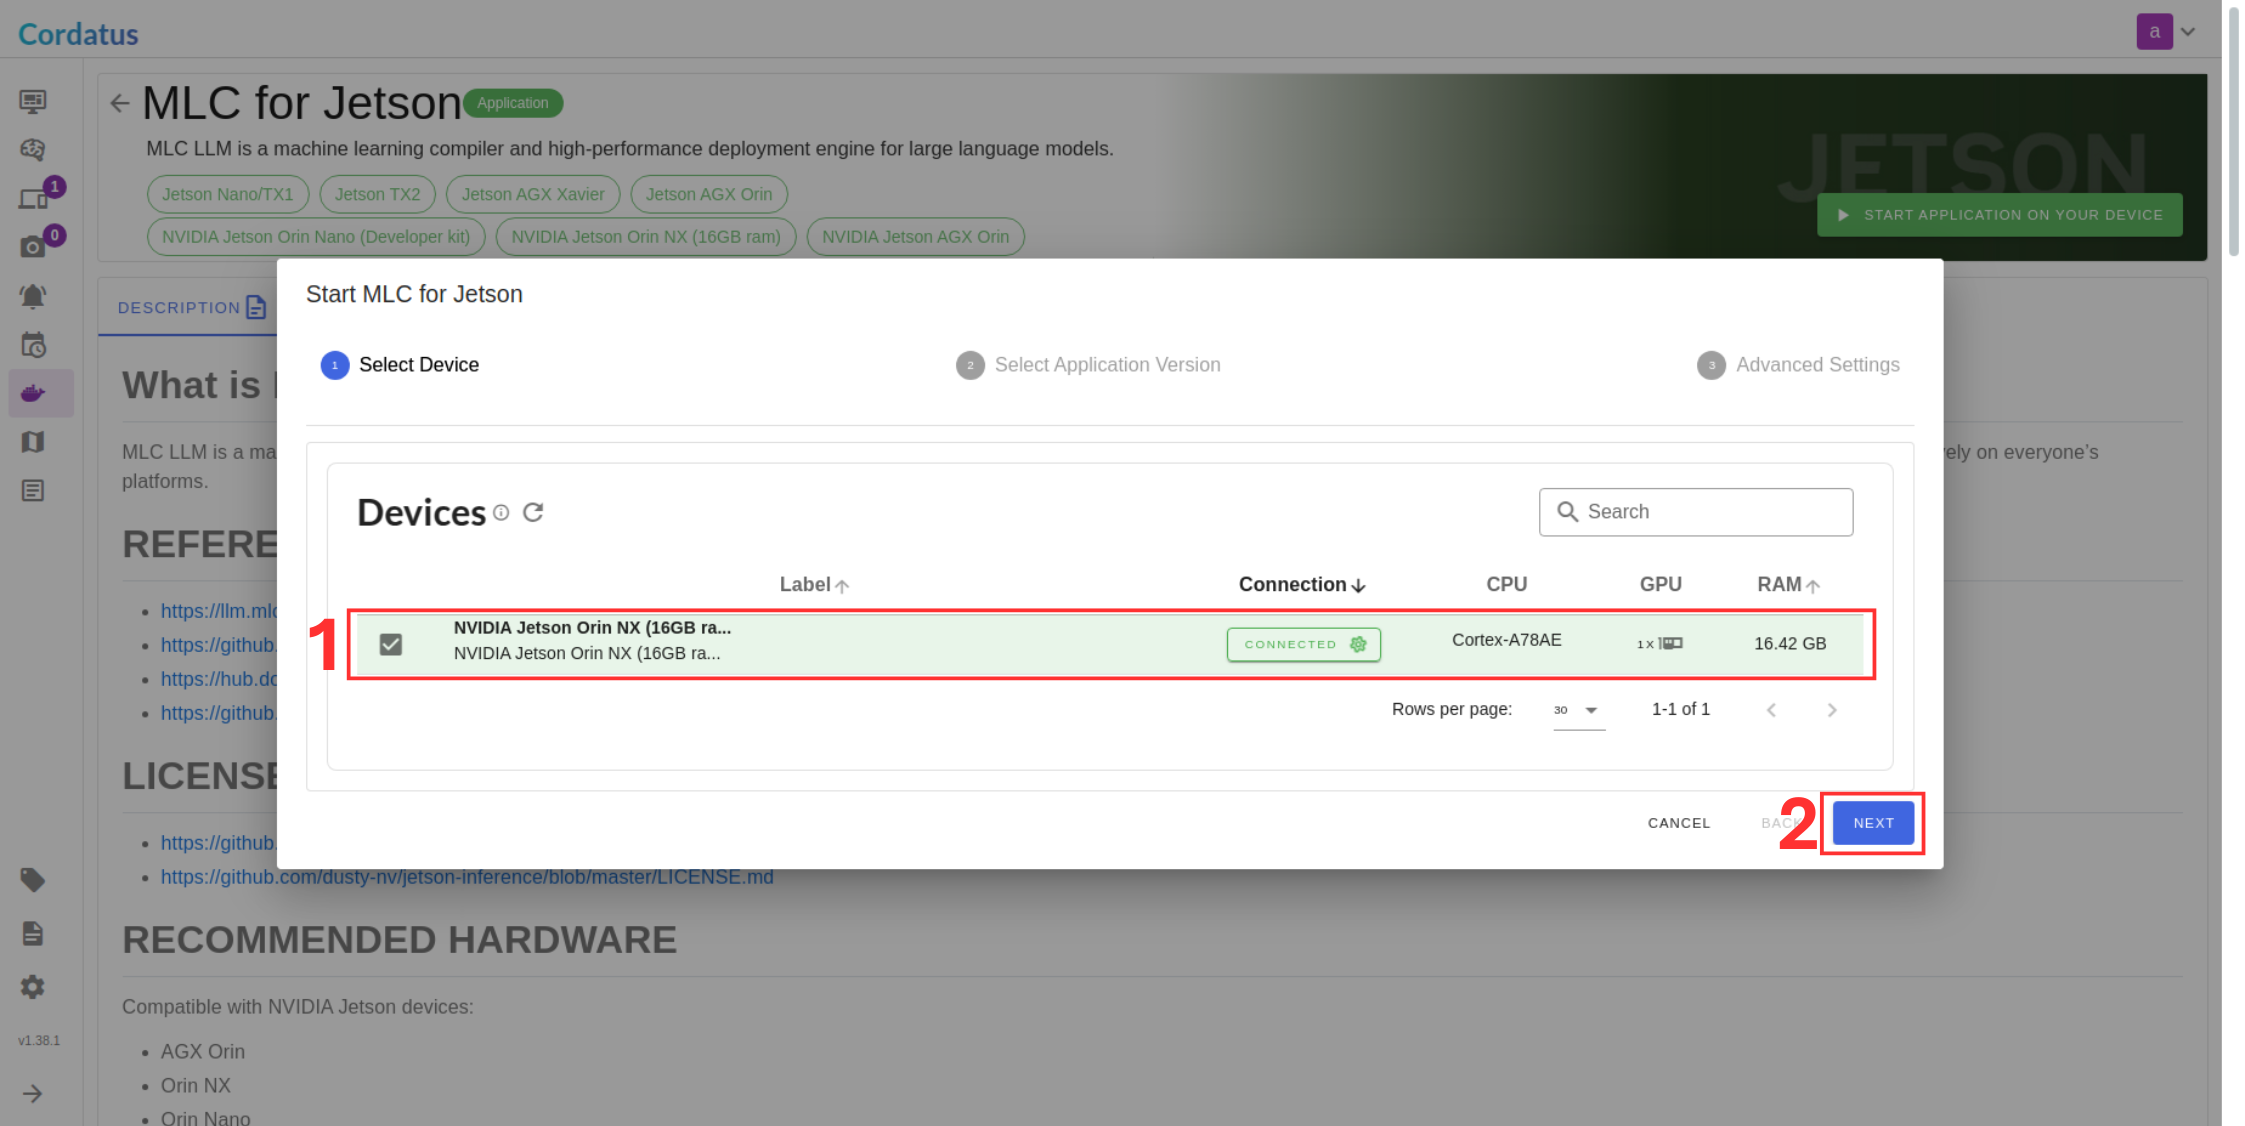
5. Choose the container the model will run on (if you have no idea select the latest).
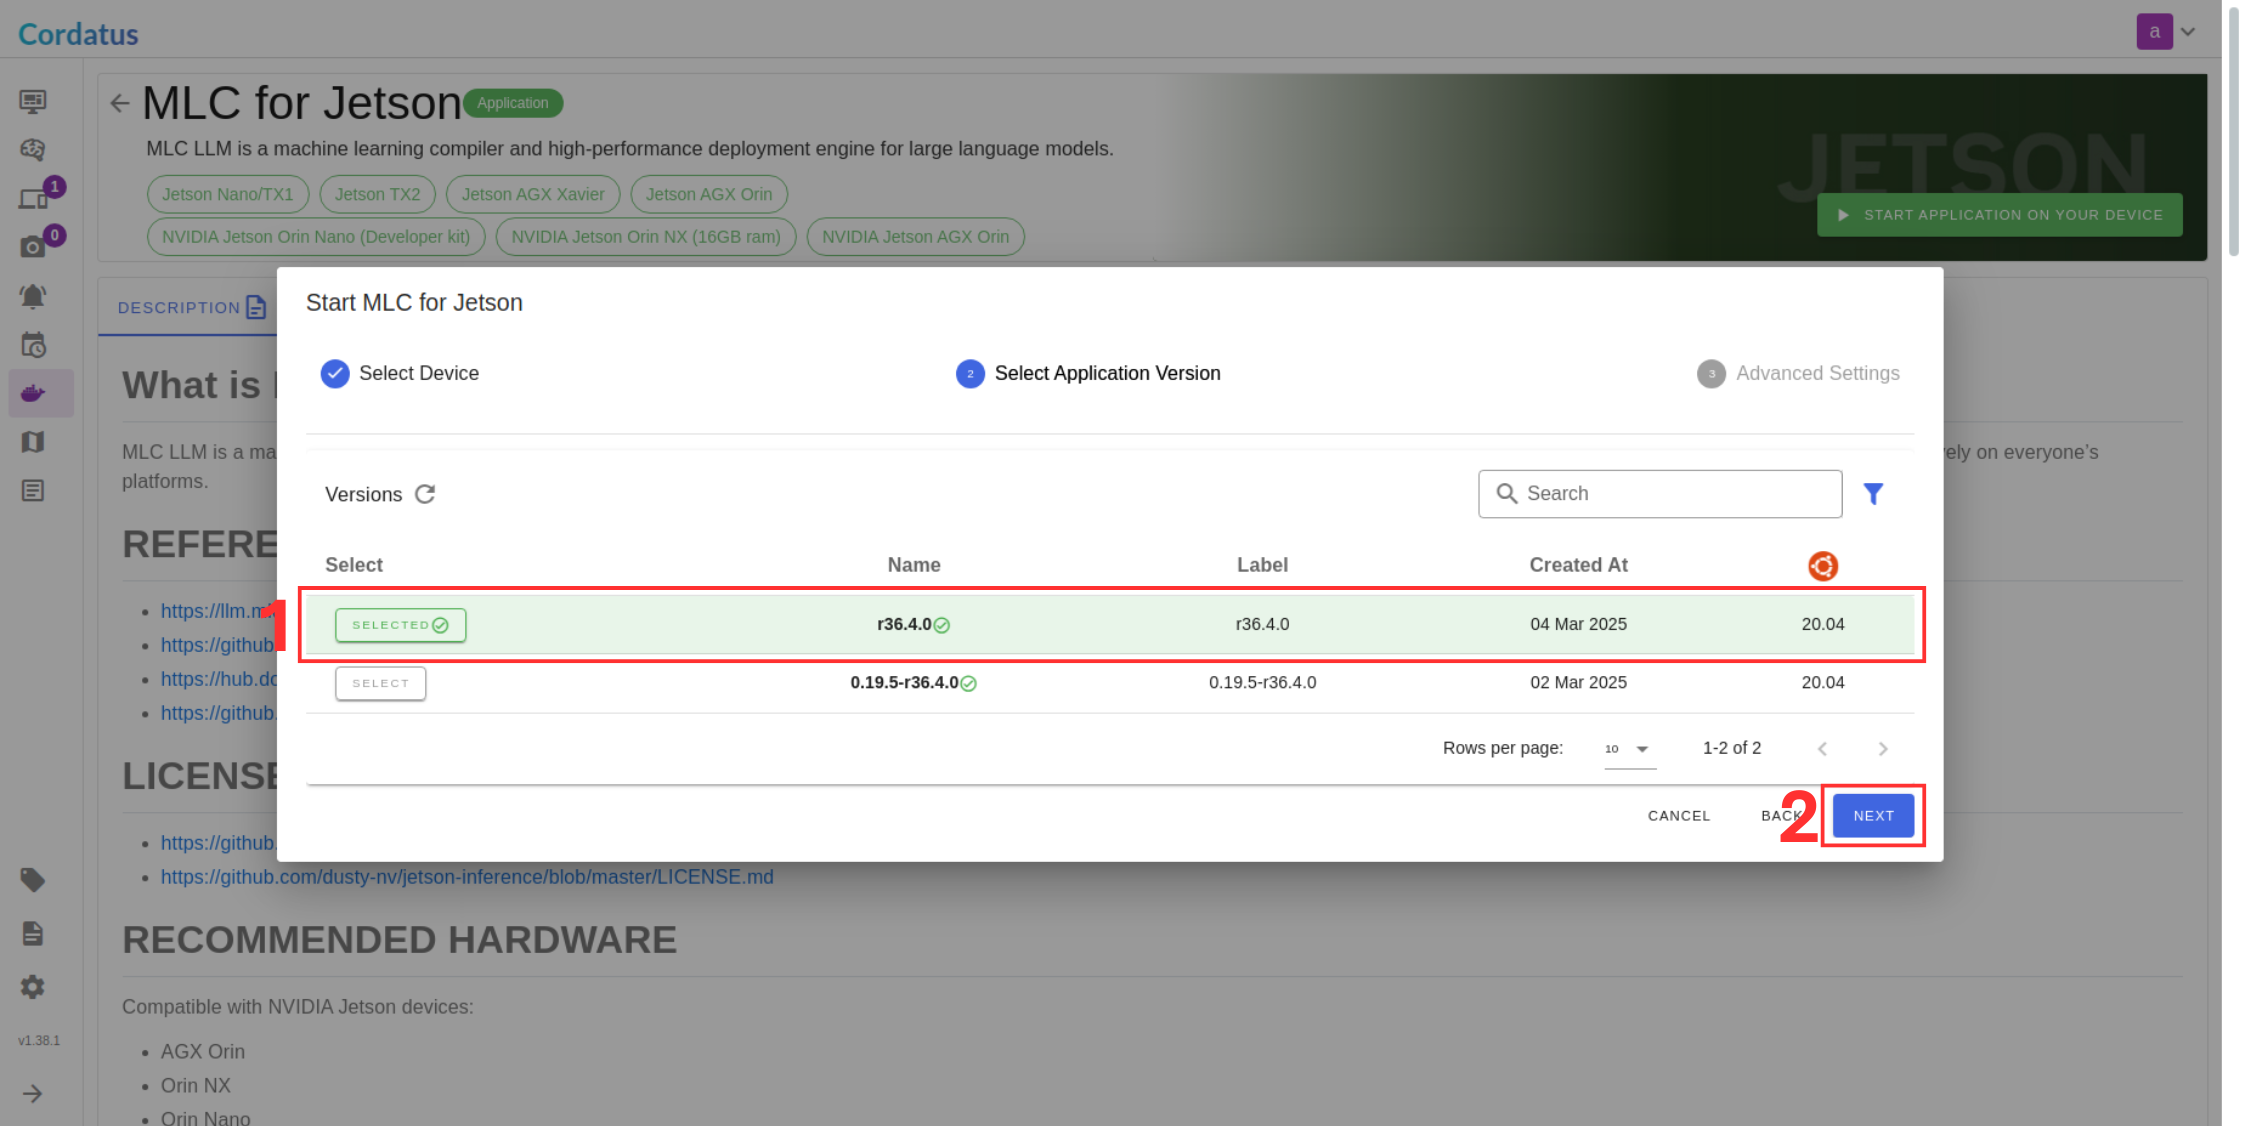
6. Verify model selection in Box 1.
7. Ensure the port is available in Box 2 .
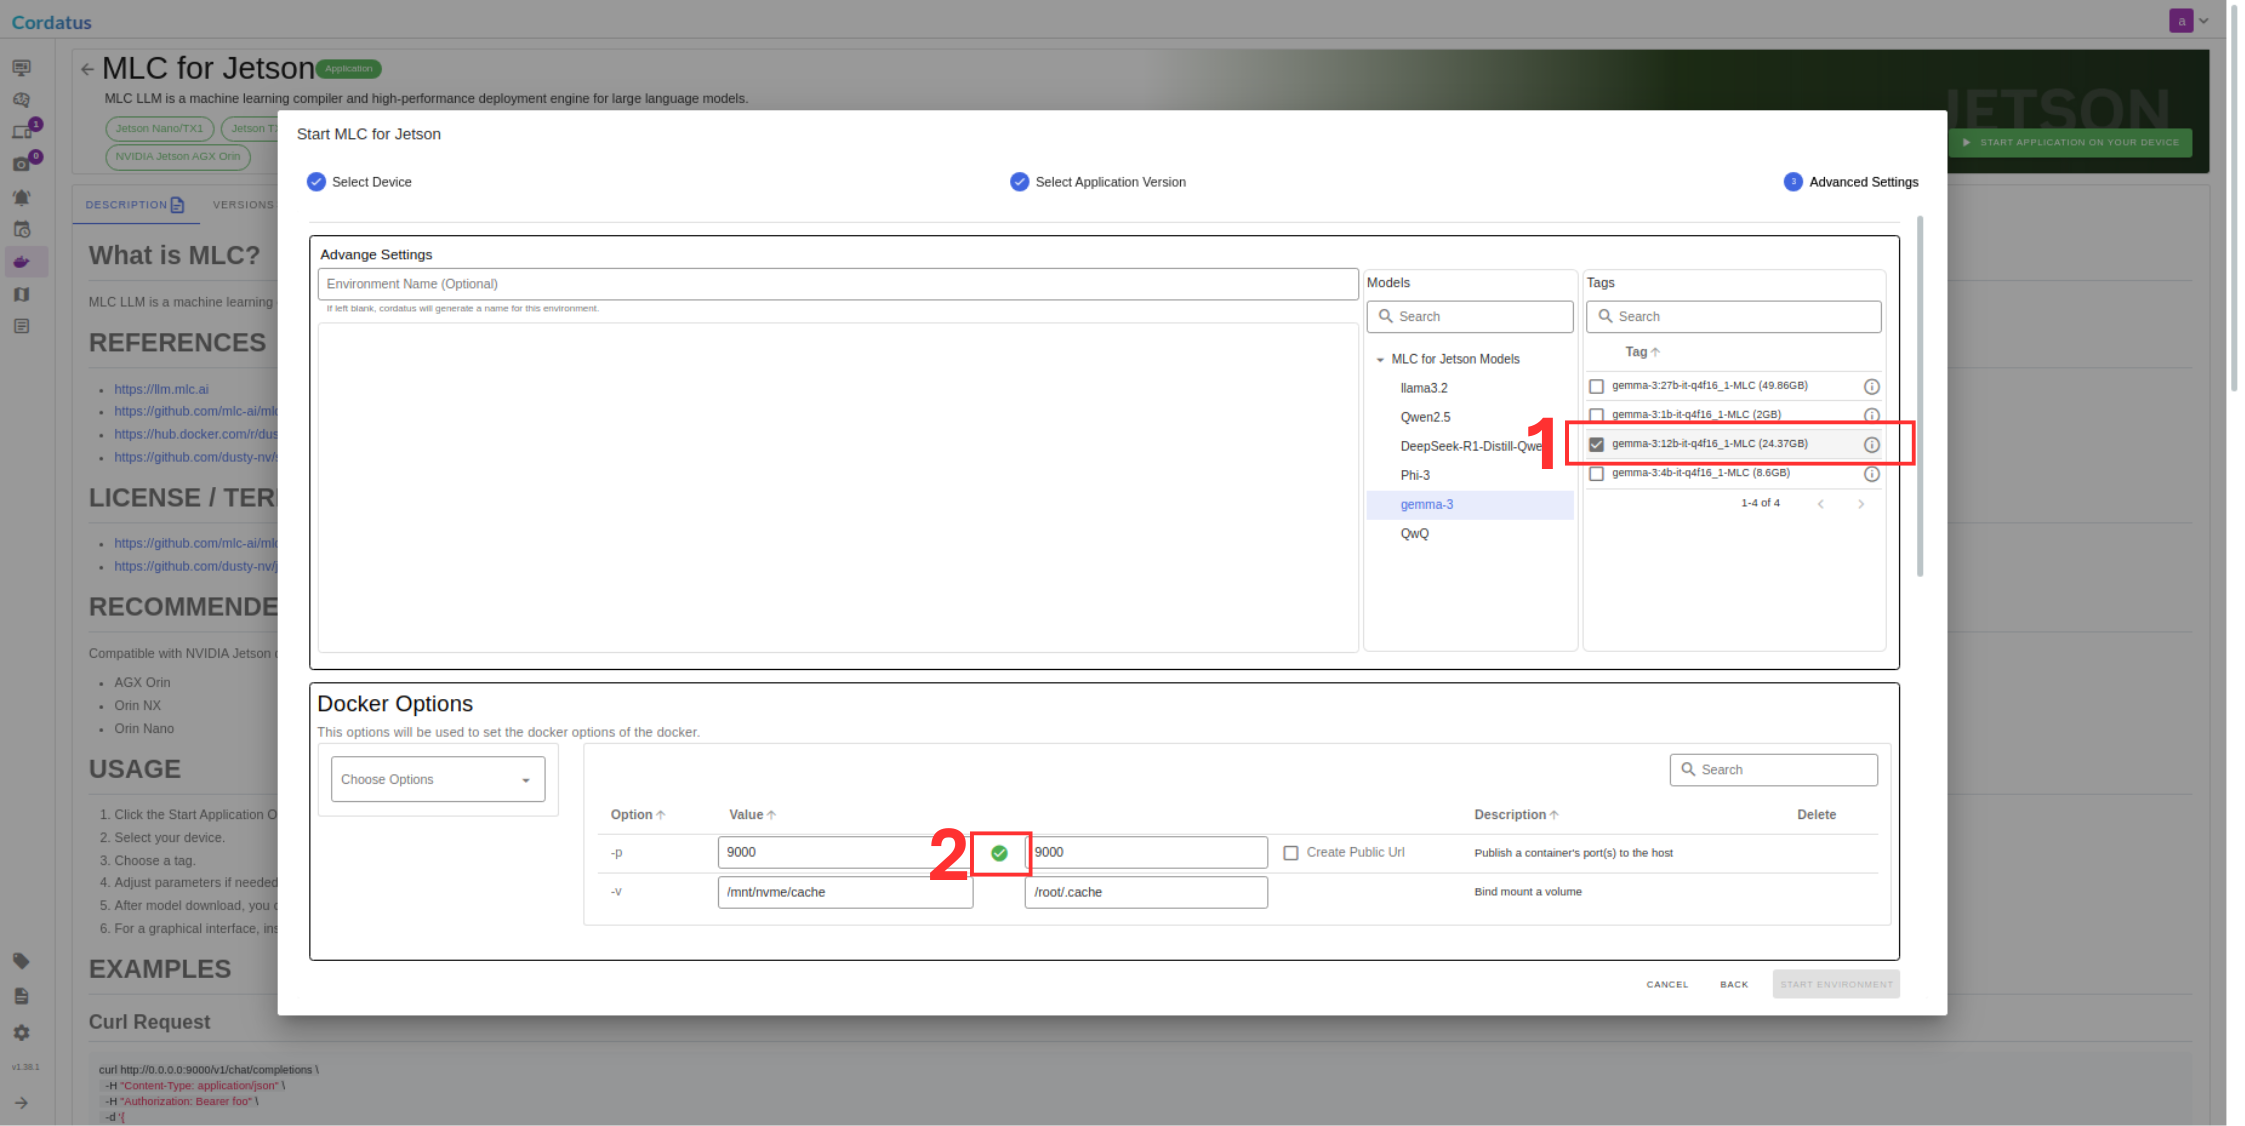
8. Set Hugging Face token in Box 1 if required by the model.
9. Modify model parameters in the MLC for Jetson Arguments tab as needed.
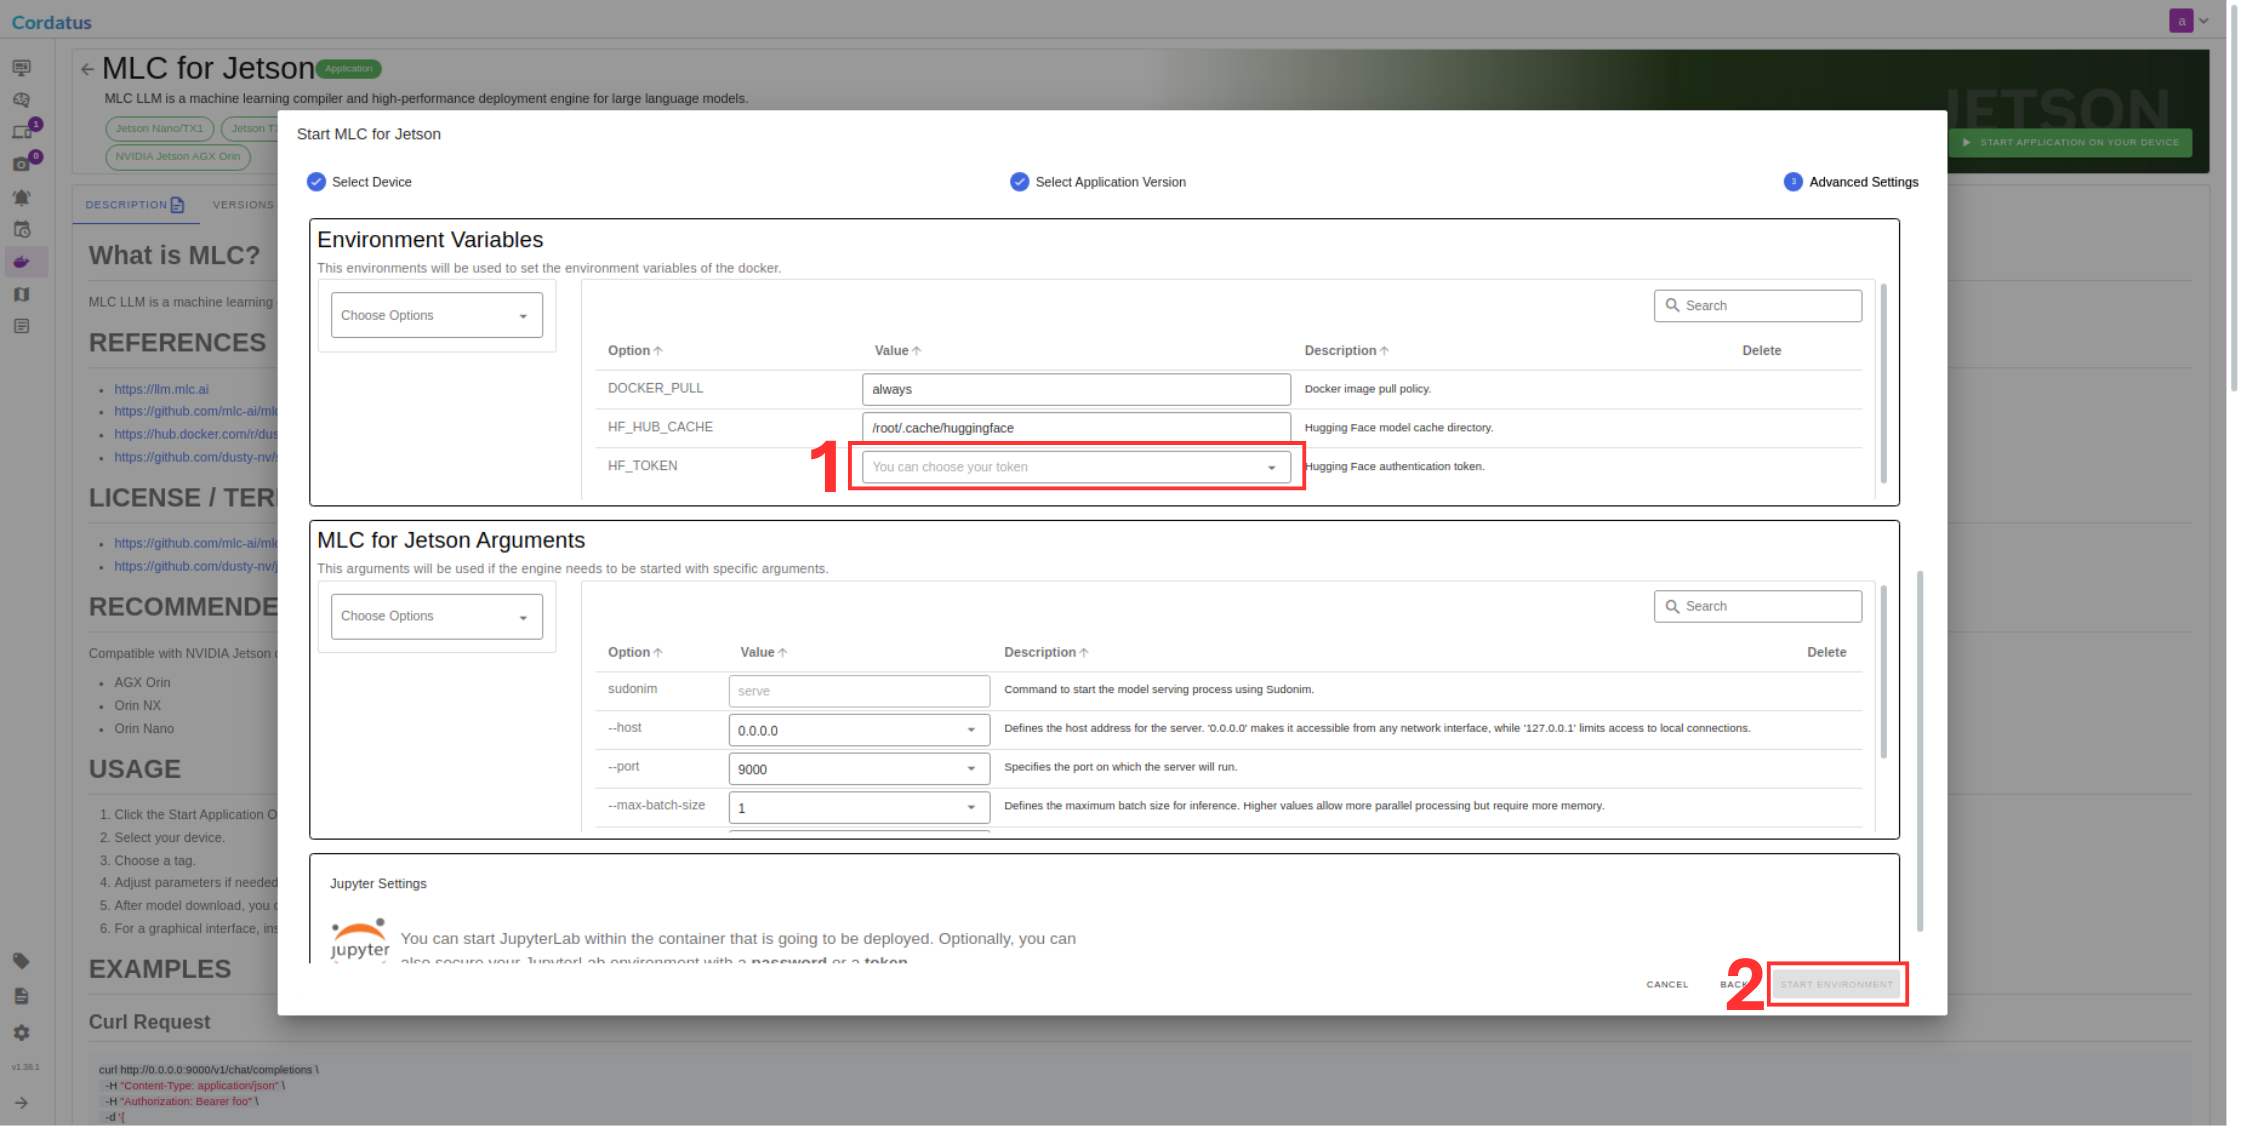
10. Click Jupyter notebook to enable if you need.
11. Click Save Environment.
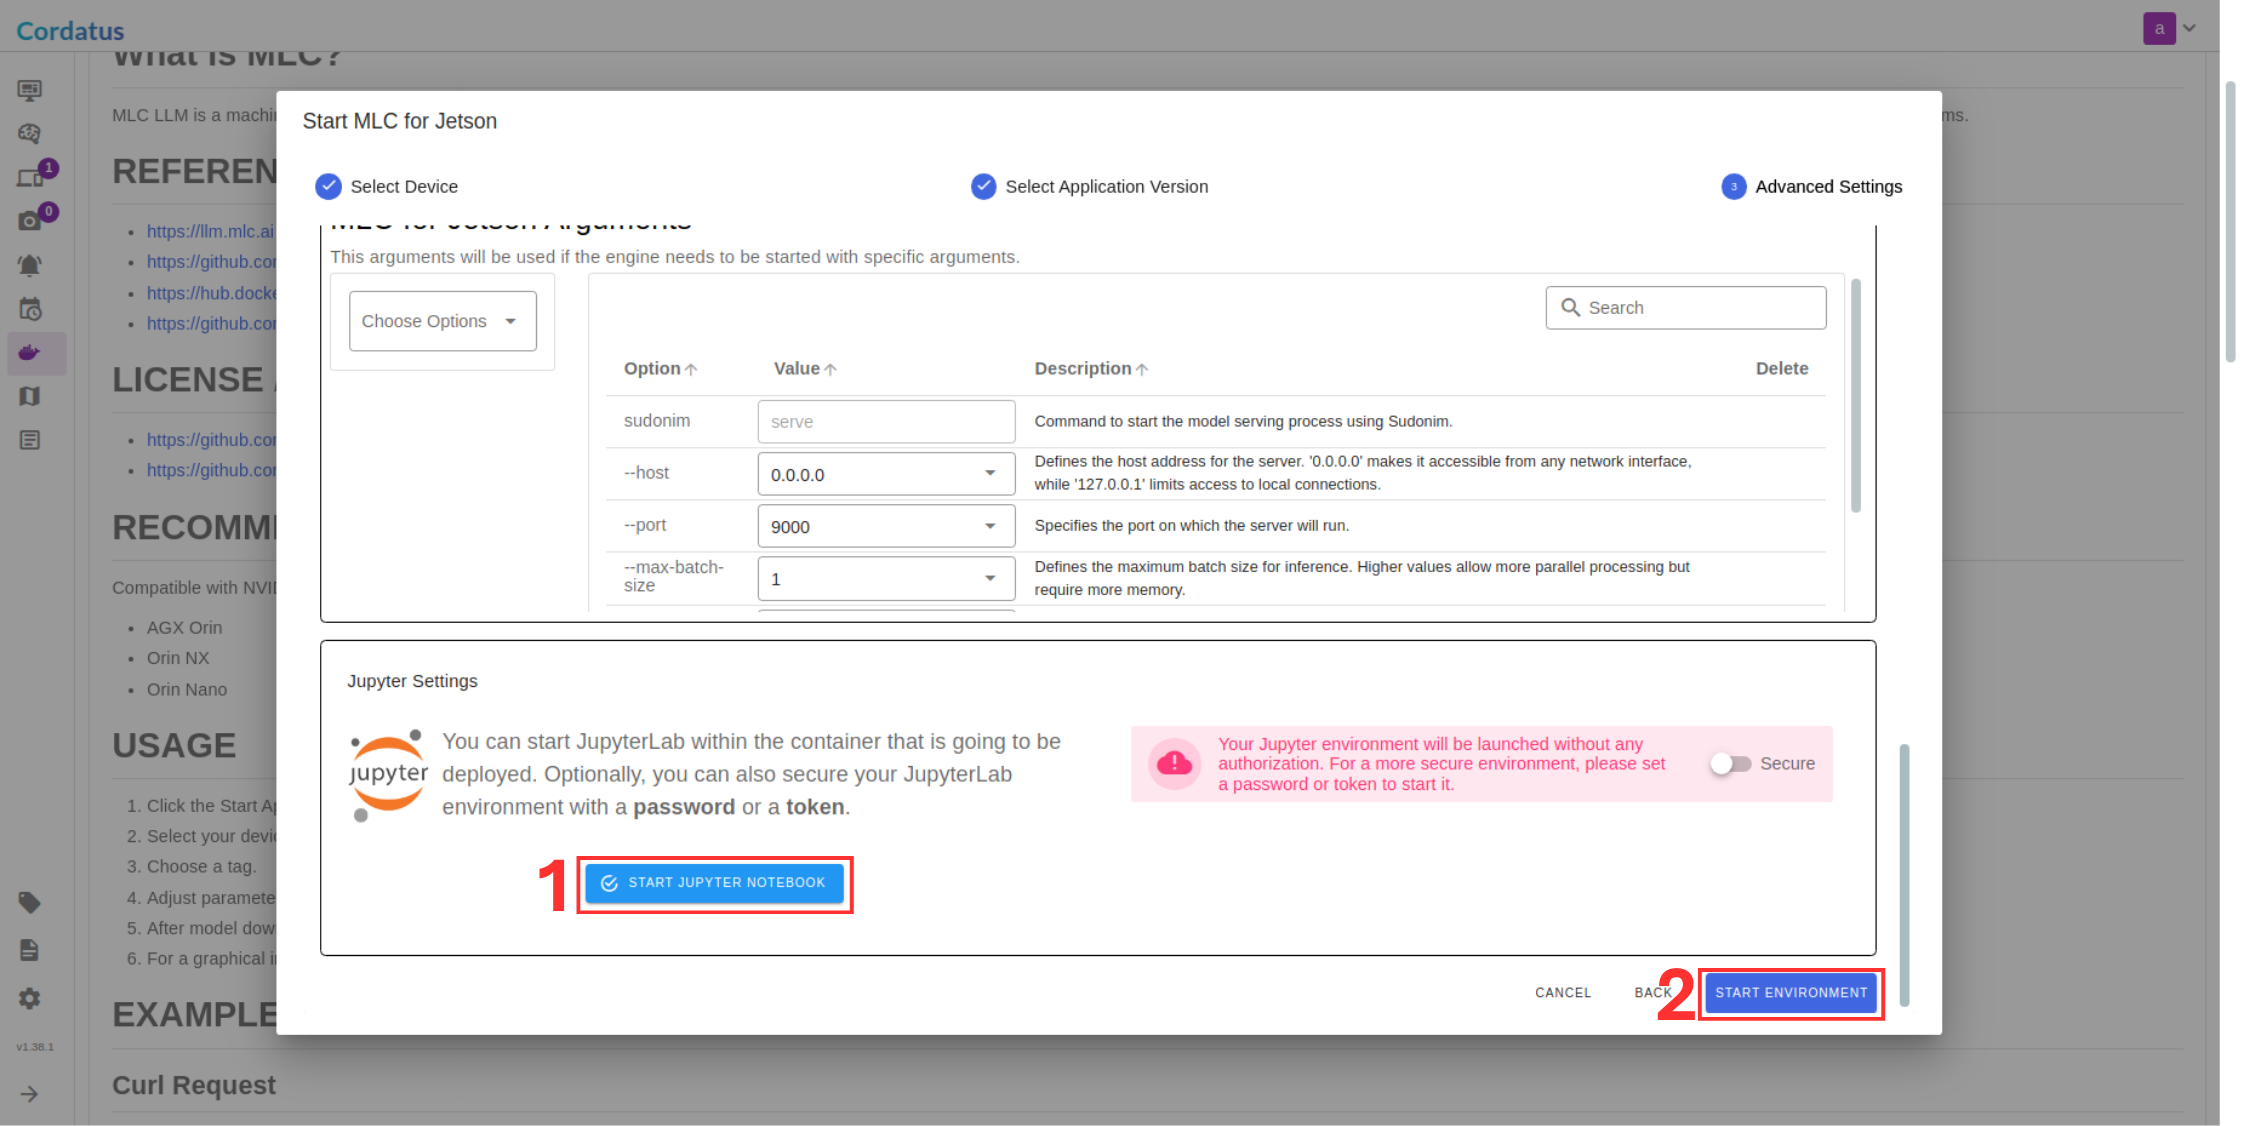
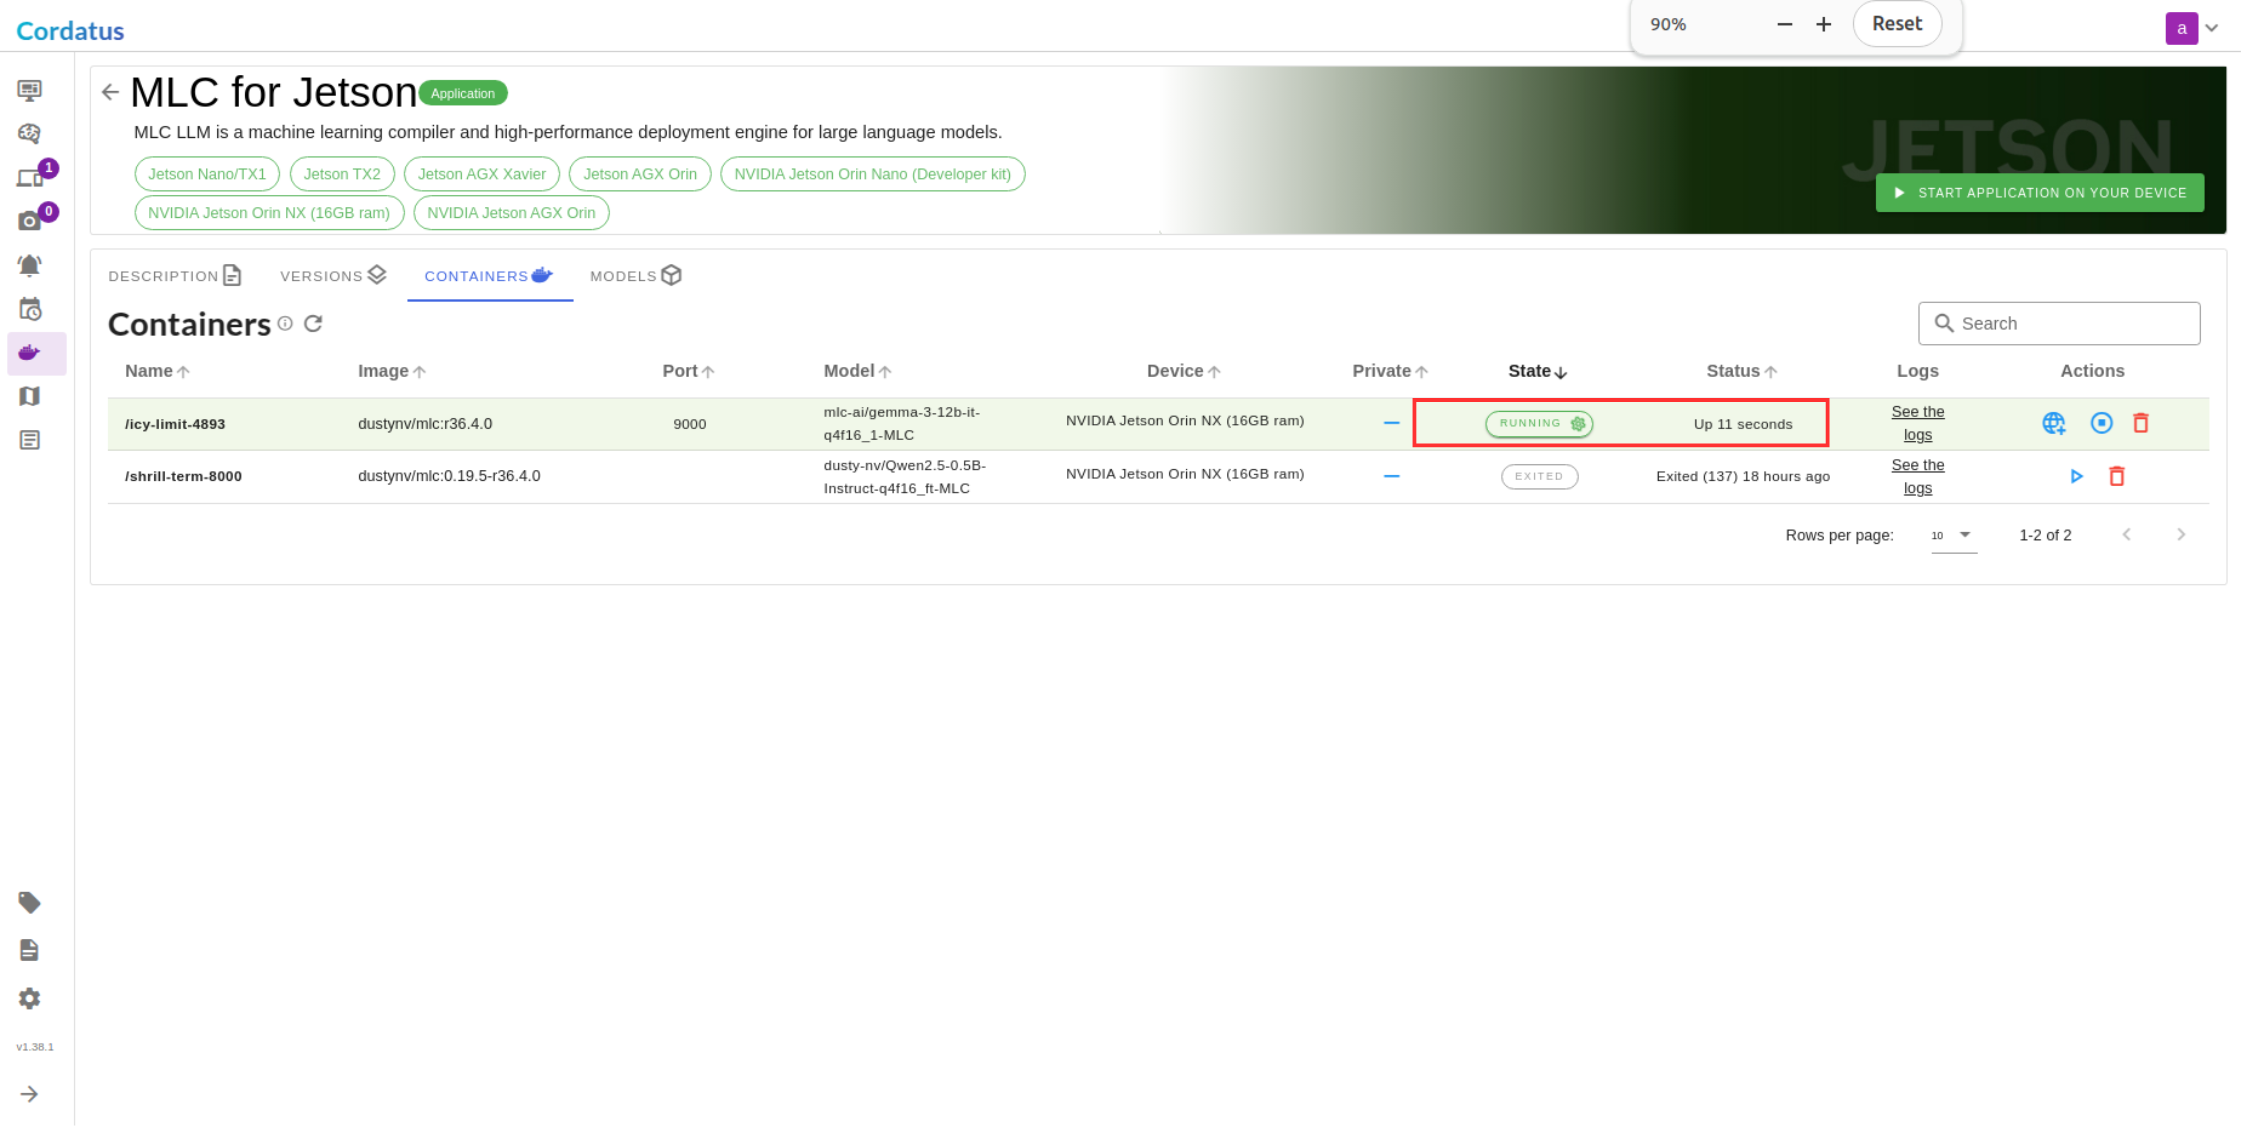
It is running !
